Nederlandse instructies hier beschikbaar →
Select your bike computer below to see the exact installation steps. Follow our guide for a smooth, hassle-free install.
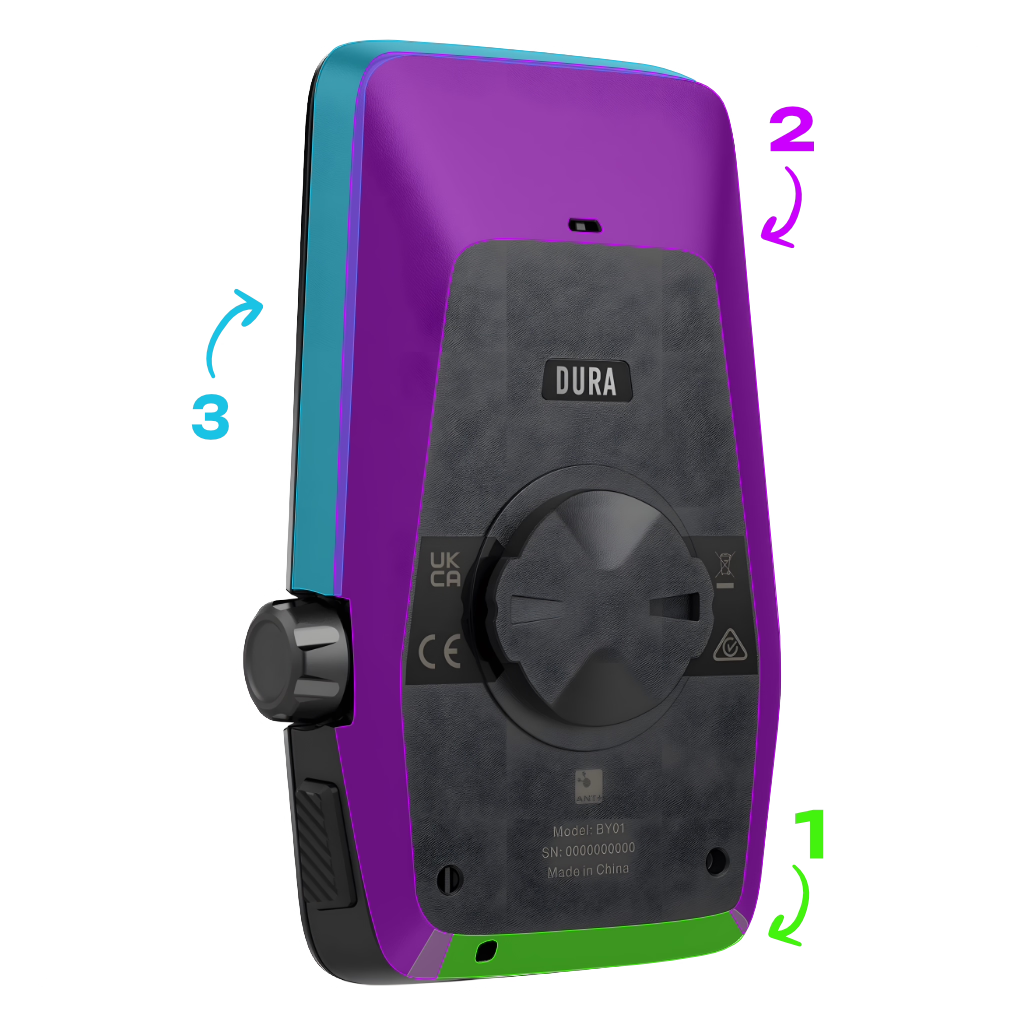
WRAPPING TIPS:
- Make sure your bike computer is clean and grease-free. First, clean it with a little dish soap, then dry it off with a clean cloth. Finally, wipe it down using the included alcohol pad to remove any remaining oils.
- All bike computer skin pieces on the sheet are already neatly pre-cut. First, remove the small cut-outs from the sticker sheet for any sensors, LED lights, or speakers on your device.
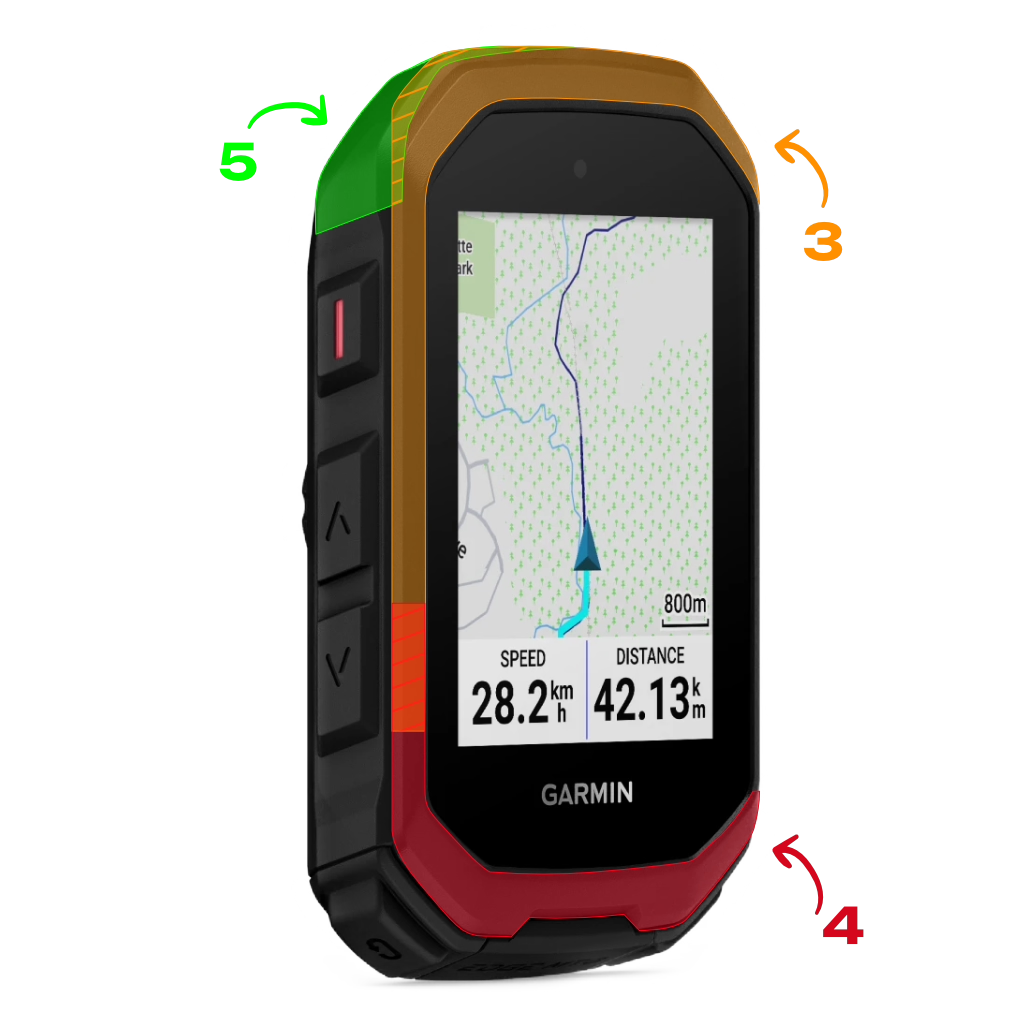
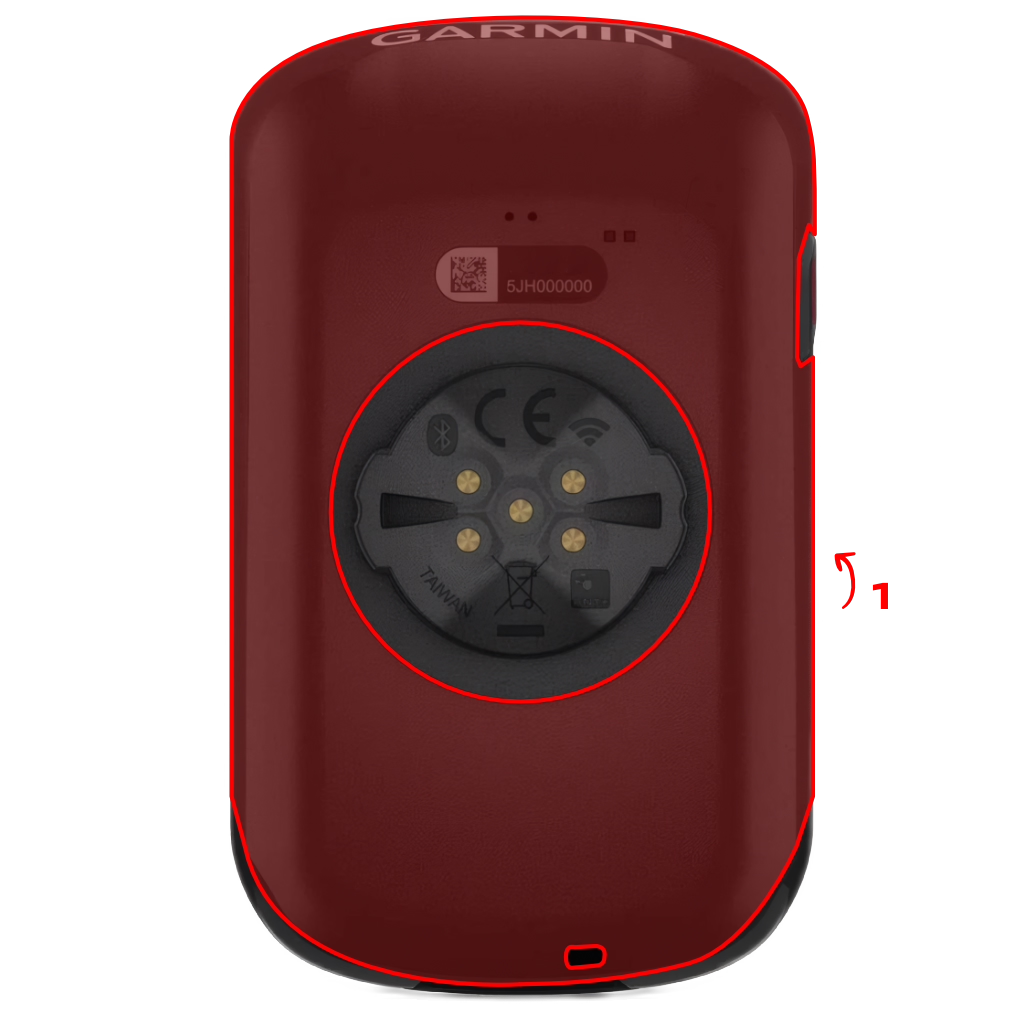
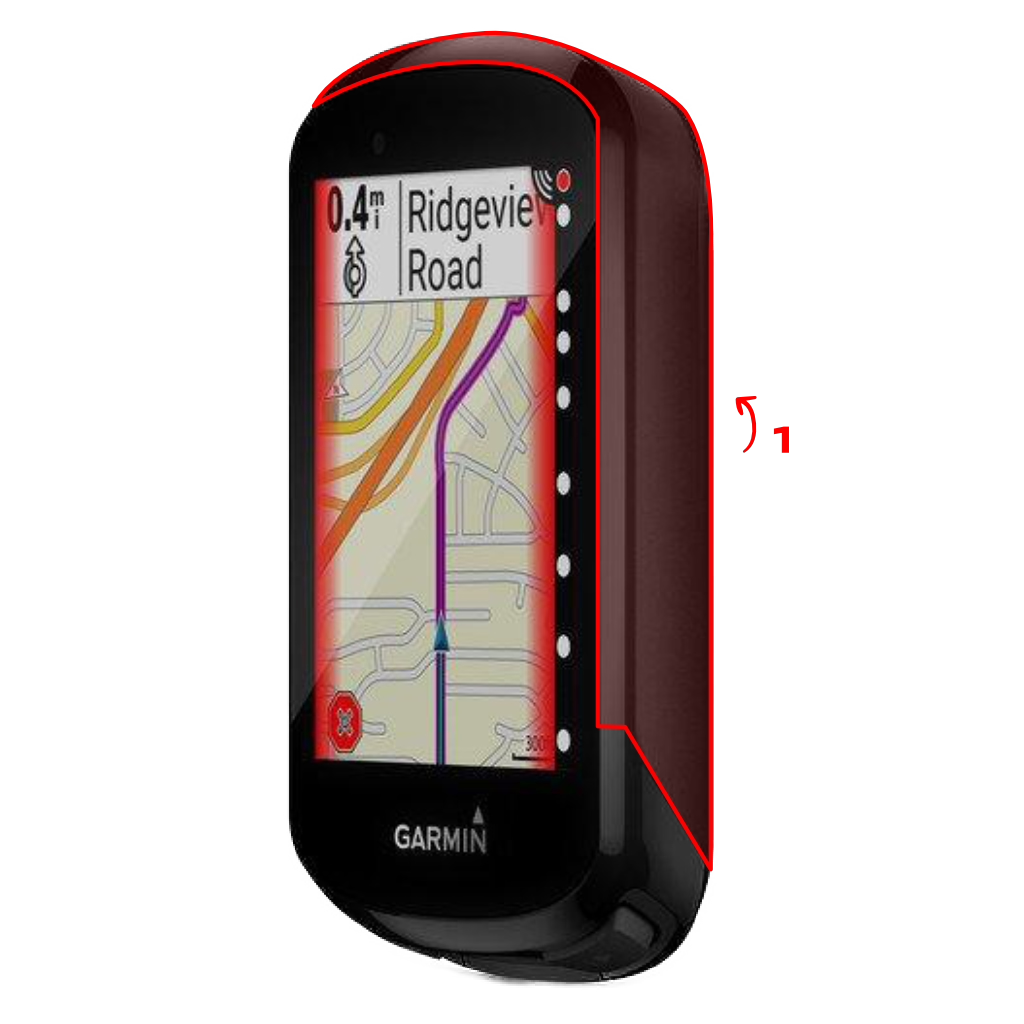
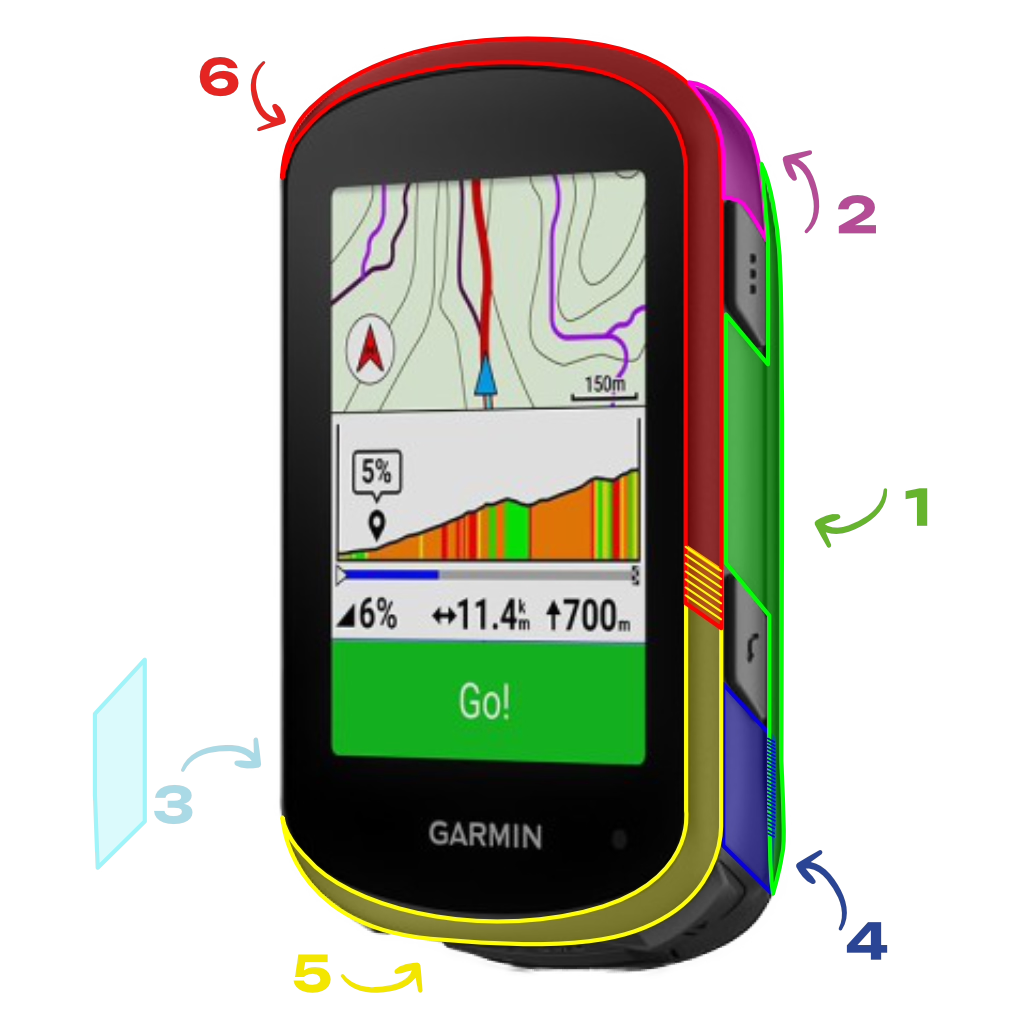
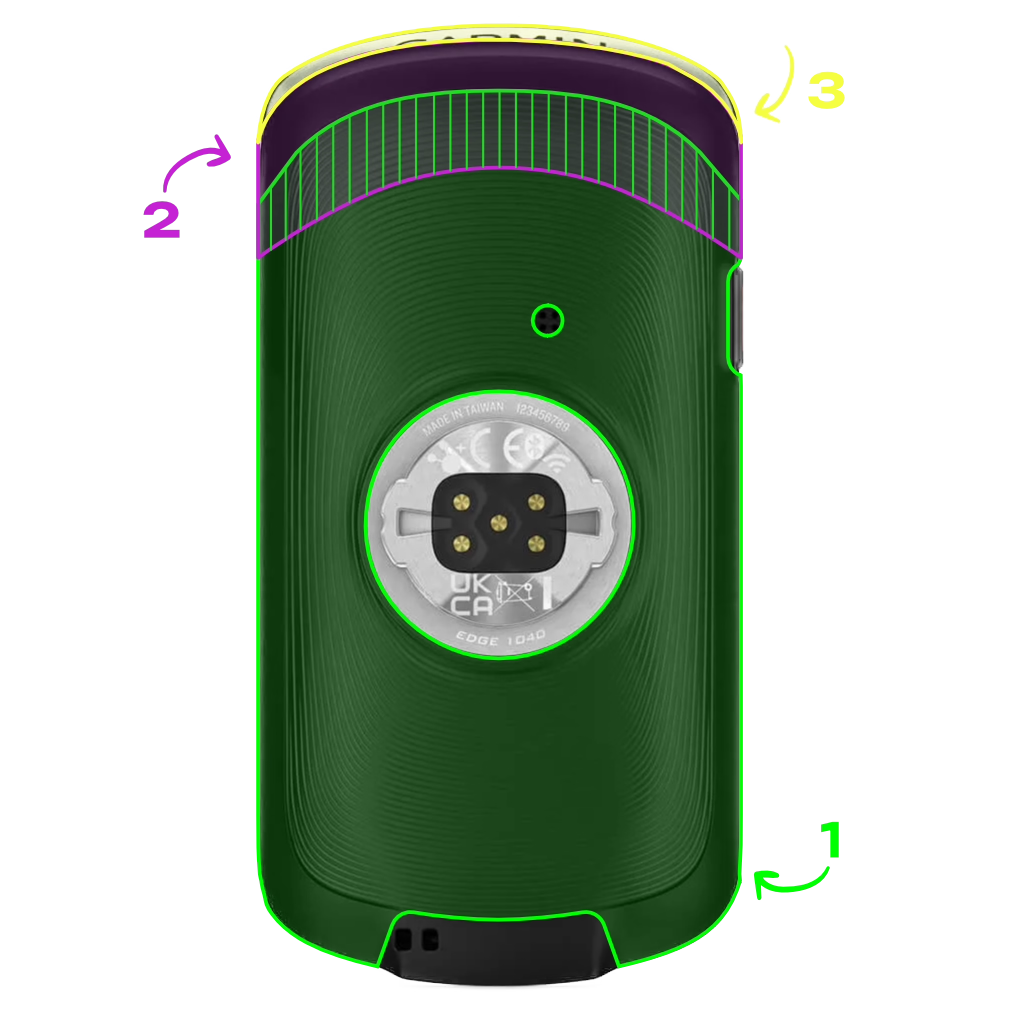
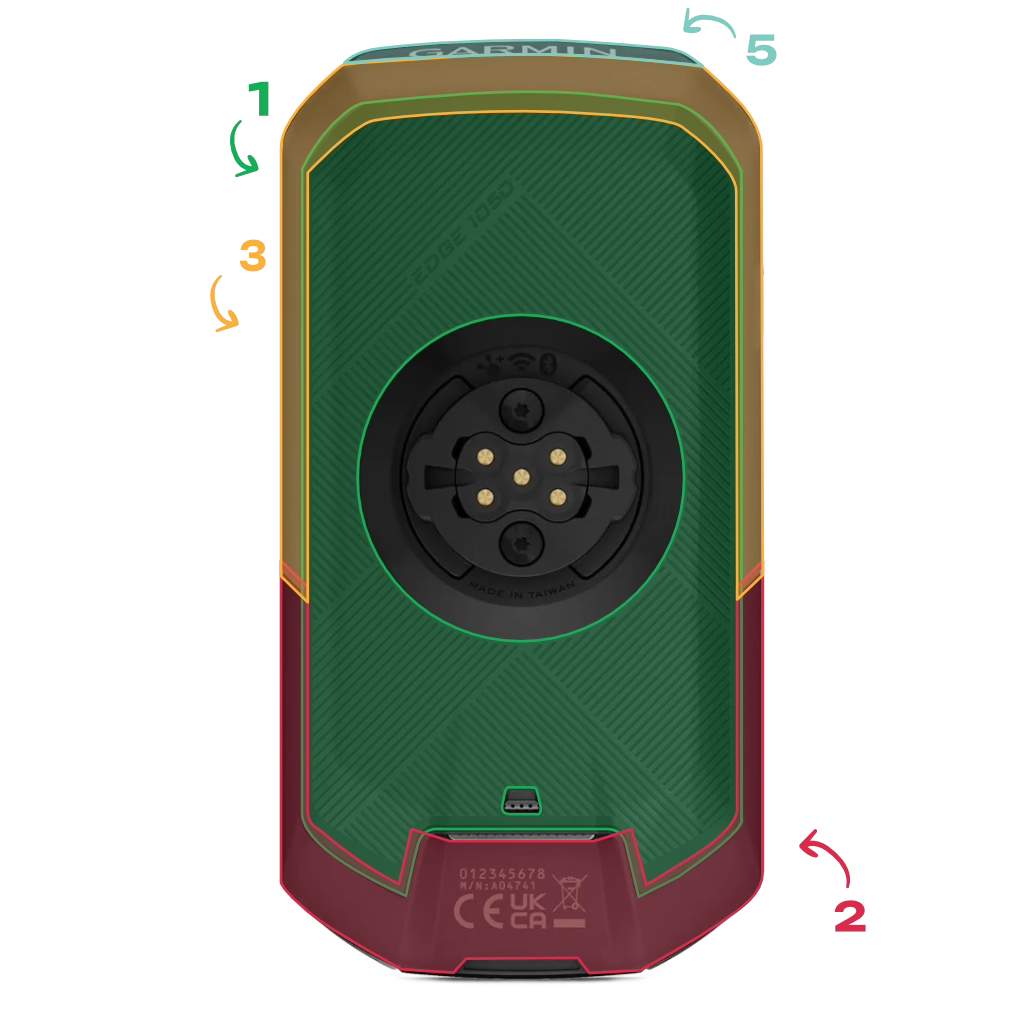
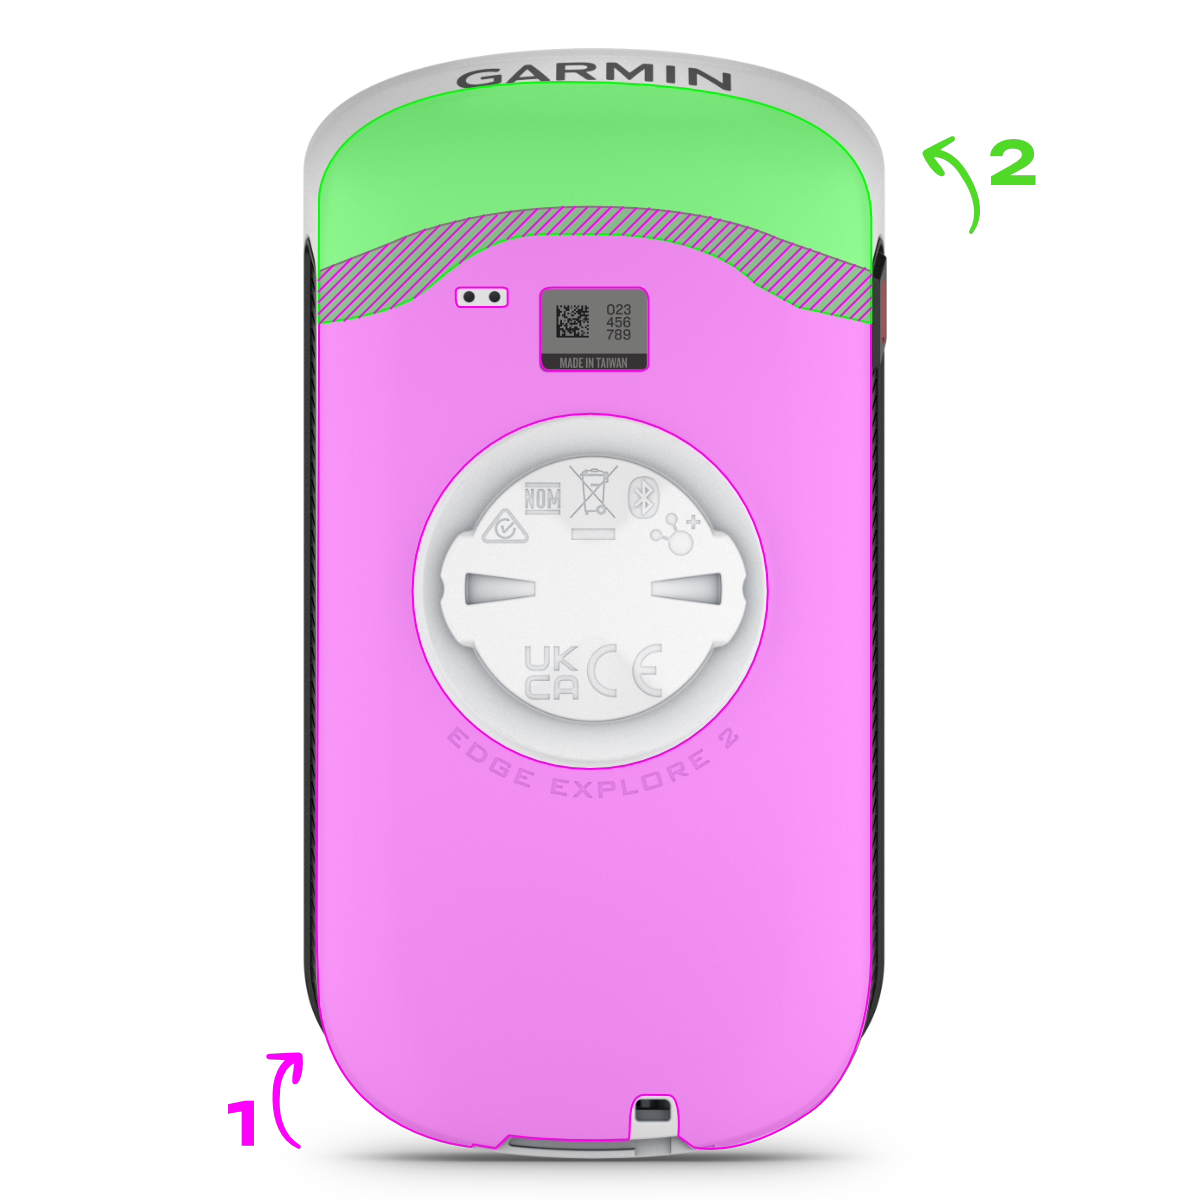
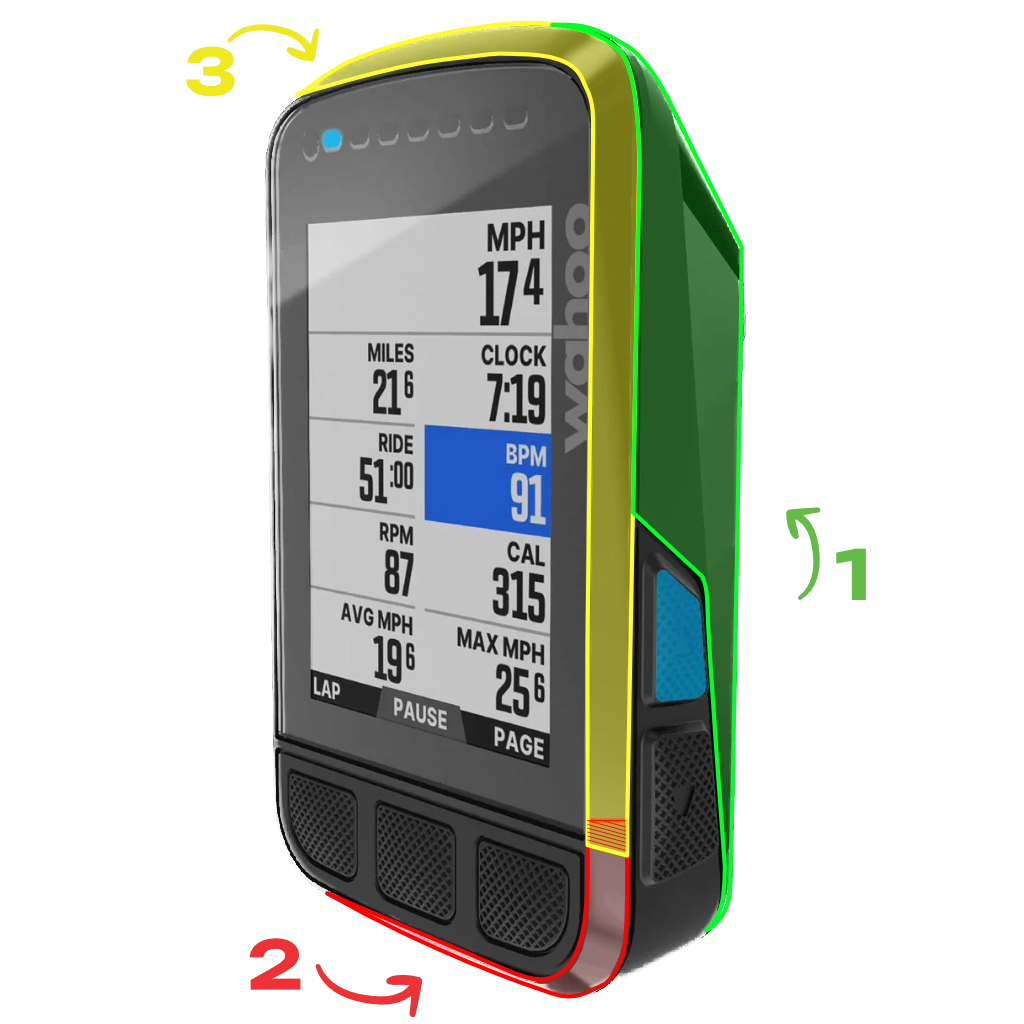
- Follow the numbers on the sticker sheet to easily apply the bike computer skin.
- While applying, you might stretch the film a bit too much. No stress. Just heat the sticker gently with a hairdryer, and it’ll shrink back to its original shape!
- Do small wrinkles show up during installation? No worries. A bit of heat will help the film shrink around the crank, and you can carefully push them out with your nail or a bank card. Just be careful with bigger wrinkles, avoid folding the film onto itself.

WRAPPING TIPS:
- Make sure your bike computer is clean and grease-free. First, clean it with a little dish soap, then dry it off with a clean cloth. Finally, wipe it down using the included alcohol pad to remove any remaining oils.
- All bike computer skin pieces on the sheet are already neatly pre-cut. First, remove the small cut-outs from the sticker sheet for any sensors, LED lights, or speakers on your device.
- Follow the numbers on the sticker sheet to easily apply the bike computer skin.
- While applying, you might stretch the film a bit too much. No stress. Just heat the sticker gently with a hairdryer, and it’ll shrink back to its original shape!
- Do small wrinkles show up during installation? No worries. A bit of heat will help the film shrink around the crank, and you can carefully push them out with your nail or a bank card. Just be careful with bigger wrinkles, avoid folding the film onto itself.

Can’t find your bike computer? Or missing the install guide for your model?
Reach out to us at [email protected] and tell us which bike computer you’re using and which product you bought. We’ve got you covered.